
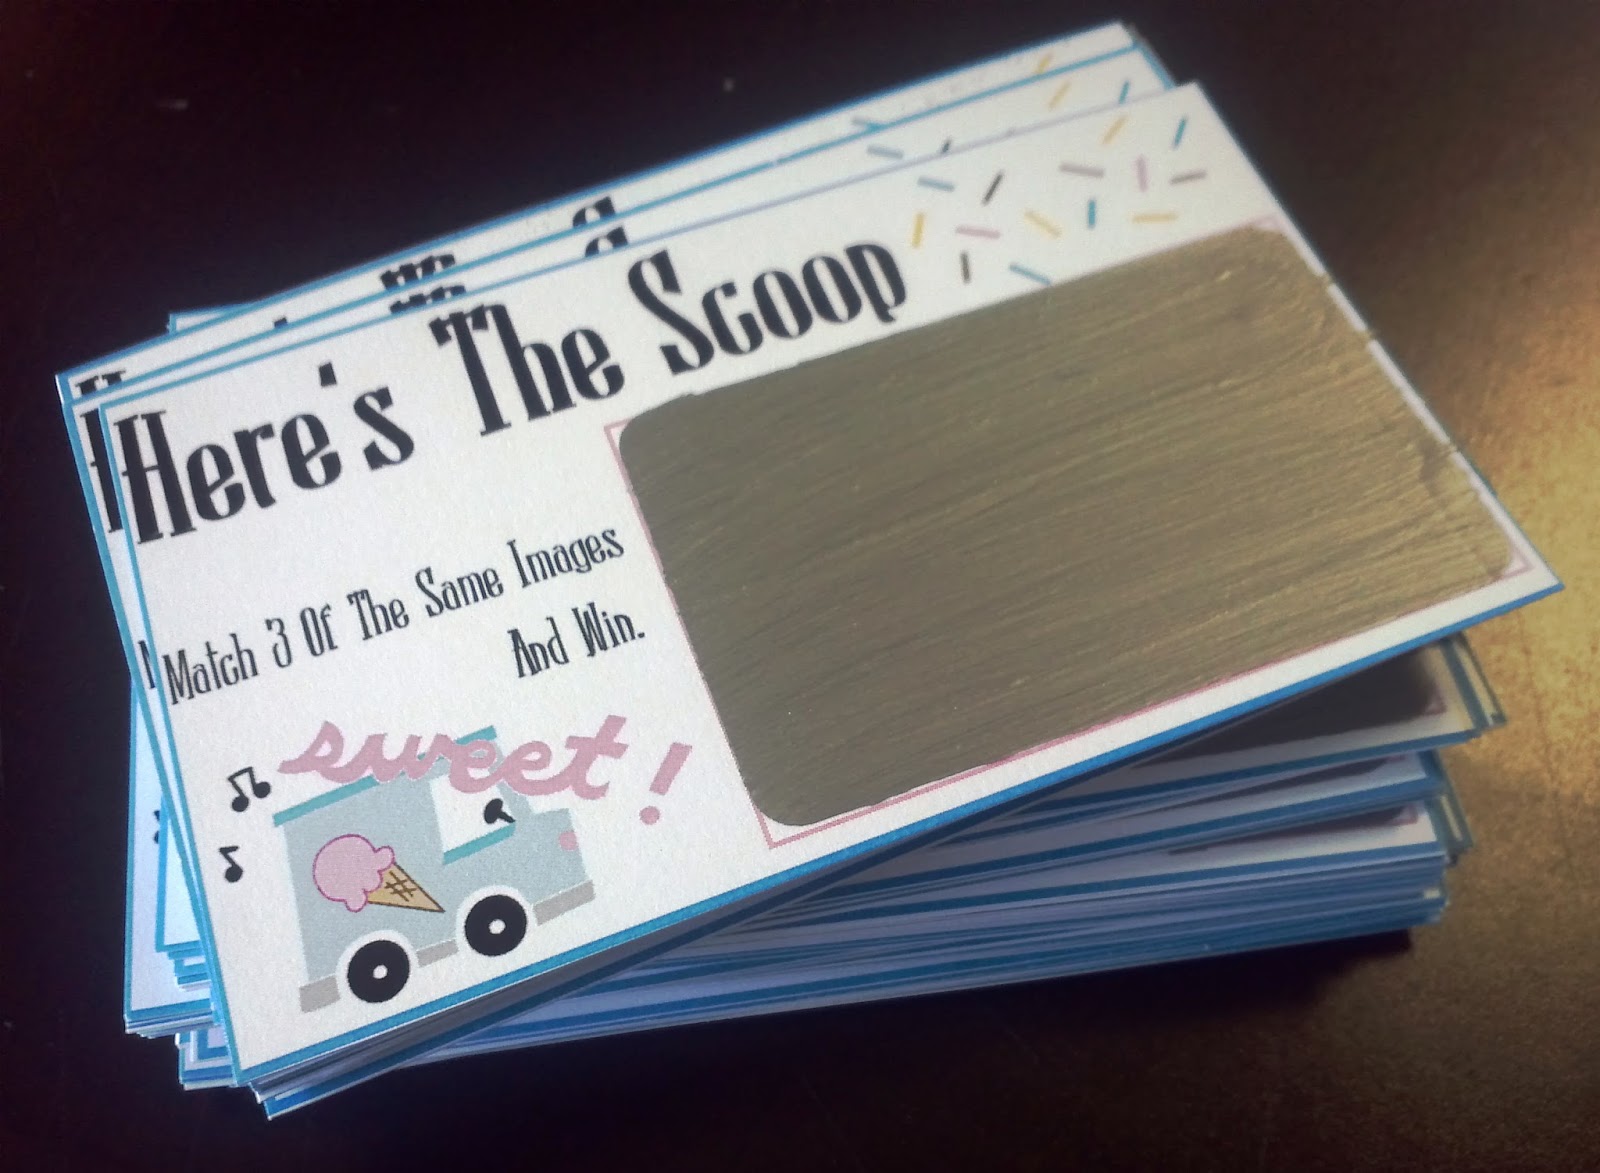
An event came up and this seemed like a better idea instead of having a raffle. Yes, this is more time consuming to set up and make than a raffle, but it is worth it. The theme for this event was an Ice Cream Social, so the scratchers definitely had to have an ice cream theme.
When I originally did this I used Acrylic paint since that is what I usually paint with, this time I thought I would give Tempera paint and it did NOT work. The tempera paint cracked and was very see through. I ended up using "Liquid Metal" this time. I designed my own template and it did have a personalized design on the back. If you want to use mine, minus the back click here. If have nothing printed on the back of your scratcher, you might want to back it with construction paper so the "winnings" aren't as see through. This really varies on the type of paper you use and how thick you paint.


Since my labels were the Avery Clear Glossy 2"x3" labels. I based the rest of the ticket around the size of these Avery labels. After completing them, I wish that I would have rounded my corners to match the label.
Making your own scratchers is pretty easy. The only thing that makes it take awhile is that you have to wait for the paint to dry between coats. I was making so many that by the time I finished painting one coat on all of them, they were dry enough to do the second coat and so one.
Continue reading to find out how you can make your own for any event.
Supplies
Scratcher Template
Cardstock
Avery Glossy/Clear Rectangular Labels 2"x3" (#22822)
Metallic Acrylic Paint (Tempera will NOT work)
Dish Washing Soap
Paint Brush
Scissors or Paper Cutter
 1. Print out your template onto cardstock.

2. Mix metallic paint and dishwashing soap together, about a 2 to 1 ratio. You don't want to put too much soap into the paint. Play with the ratio, depending on the brand of acrylic paint you are using. Paint thin layers onto the Avery labels. Making sure that each coat is completely dry before painting the next one. You will need about 3-4 coats depending on how much soap you use.

3. While the paint dries, you can use this time to cut out your templates.
4. Once the paint dries, remove the labels. You will want to pull the label off in the opposite way that you painted.

5. Place label onto template.
6. Scratch away!

Looking for more crafts? Check out what I've done
 |
| DIY Wooden Heartin Frame |
 |
| DIY Grocery Bag Container |
 |
| DIY Glittered Vases |
These are so cute. I need an excuse to make these! I love the look and thanks for posting so many pictures.
ReplyDelete