I go through different hobbies really fast, just because I get bored of it for awhile and eventually I'll get back into it. I got bored of painting earlier this year and decided it was time for a new hobby for a little bit. I never tried to make my own jewelry before and figured it would be something different.
I came across Flamingo Toes awhile back and loved her blog. When I saw this tutorial for a knock-ff of David Yurman: Hematite & Pearl Sterling Silver Multi-Row Bracelet, I had to make it also :)
Here's What You Need
Assorted Chain Pieces (I used about 14 & they were about 6 inches long)
Pearls (About 8)
Wire
Multi-Chain Closure (4 Loops)
6 Jump Rings
Wire Cutters
Round Nosed Pliers
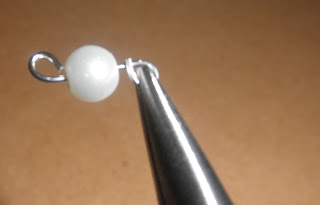
1. Slide pearl onto a piece of wire and with the round nosed pliers, wrap the end of the wire around the tip of the pliers and cross it over the pearl. Push the pearl toward the loop and wrap the wire on the other end around the tip of the pliers. Use the wire cutters to cut off the excess. You should have 2 loops, one at each end. Repeat this process until you have about 8.
2. Attach the pearls with small pieces of chain. Make sure it measures the same length of the other chains you cut. (I only did two, but you can do more if you want)
3. Sort the chains in how you want them arranged on the bracelet.
4. Attach the chains to a jump ring and attach to one of the loops on the closure piece. Place the other ends of the chains onto another jump ring and attach to the opposite loop on the other closure piece.
5. Repeat 3 more times
When I finished it, I didn't like the fact that I had so many thin, light chains. It was too light, I liked the feeling of having a bulkier and heavier bracelet. So I swapped 3 of the out with a thicker chain that I had. Above is the finished bracelet with the thicker chain.
What do you think?


I love your blog. This is the cutest bracelet.
ReplyDelete