Wednesday, February 5, 2014

Kale Chips


Looking for a healthy option to snack on after all of the Super Bowl treats? These kale chips are just the healthy crunch that you are looking for. The best part about these kale chips is that you don't need a dehydrator. Your oven will work just fine for this. With just 4 ingredients, you are on your way to making crispy, crunchy and healthy chips.

I went to the Farmers Market and saw a handful of varieties of kale that isn't normally sold in the grocery store by me. Being super excited about all the different types of kale there was, I went a little overboard and bought way more than I really should have. I use kale every morning in my smoothies, sometimes toss them in my salad or soup, and my dog loves to eat kale as a treat, but other than that I really wasn't sure what to do with all the kale I had. Kale chips were perfect and easy enough that I thought I would share with you.

Thursday, January 30, 2014

Homemade Pizza Rolls


Since it's Super Bowl weekend, I thought I'd share with you another Super Bowl snack. Whether you are rooting for the Seahawks or the Broncos, or if you are just there to watch Bruno Mar and the Red Hot Chili Peppers, these pizza rolls are great for snacking while you sit in front of the TV.

These homemade pizza rolls are simple, yet crunchy, delicious and addicting. The use of wonton wrappers may not be exactly the same as Totino's, but it is close enough to where the entire plate of them will disappear fast. The key to these homemade pizza rolls is not to bake them. I prefer to avoid frying food, but I did one batch baked and one batch fried and they are best when fried. When they are baked, the edges have a texture of raw pasta. I do not like my pasta raw, so I did not like them baked. When these pizza rolls are fried, yes they are unhealthy, but the wonton wrapper puffs up and becomes crunchy. Way better!

To learn how you can make your own homemade pizza rolls and ditch the frozen ones where you aren't quite sure what exactly is in it, than keep reading....


Monday, January 27, 2014

Pumpkin Pie Crumb Bars


I know I'm pretty much a couple seasons behind and it's not longer Fall, but who says that it has to be Fall in order to be able to enjoy a little pie of Pumpkin Pie? Why should we restrict ourselves to Pumpkin Pie once or twice a year. To me, it's always a good time to have a little pumpkin in my life. The mix of soft, light pumpkin with a hint of cinnamon and nutmeg is perfect whether it is Fall, Winter, Spring or Summer. 

With it being Super Bowl this weekend, you should surprise your guests and continue to spread the pumpkin love. What's the best part about these bars? It's pretty much a portable piece of Pumpkin Pie! None of the messing around with having guest cut their own slice of pumpkin pie, they can just simply pick up a bar and in a few bites it's gone.  I also love these Pumpkin Pie Bars because I'm not a huge fan of pie crust. I always feel that it's missing something. With the addition of the oatmeal cookie crumb, it takes this slice of pie to another level.

Saturday, January 25, 2014

DIY Soothing Lavender Oat Bath


With the crazy weather in California, one day it's in the 80's and the next day it's in the 60's and the Santa Ana winds, my skin is not handling the constant change from hot to cold combined with the dryness. If you have sensitive skin like me, or if you just enjoy an oat bath like Sean, than you will love this diy.

Sean first got me into oatmeal baths when I have a really bad skin reaction to the weather and suggested that I used the Aveeno Soothing Oatmeal Bath Treatment. I loved it, but what I didn't love was paying $8 for 8 packets. I know it's $1 each and that is a lot for me.

If you didn't know the Aveeno bath is made from 100% colloidal oatmeal. Colloidal oatmeal is great for dry, itching skin, so it's a good choice to relieve any discomfort caused by eczema, poison ivy, chicken pox, and insect bites. It is also great if you just love an oatmeal bath and want soft skin. After doing some research and finding out that all it is is simply very finely ground oatmeal, I was shocked and even more against buying it from the store. I've had a huge canister of Quaker Oats sitting in my pantry and figured if I can make it for free, why not? Right? I added lavender to mine to make it more my taste, except if your like Sean and you don't like little dots in your bath water, than you might want to stick with just the oatmeal.

Important Allergy Note: If you are allergic to gluten, I suggest you use certified gluten free oats to avoid any allergic reactions.

Now, ready to make your own? Continue reading to find out this super easy diy.

Friday, December 27, 2013

Hot Chocolate On A Stick


 I hope that you enjoyed your holiday and things are slowing down as the New Year arrives. I know that it is for me. The past couple months have been busy with birthdays, work and holiday events. Even though I have been keeping up with baking, cooking and crafting, I unfortunately haven't been updating my blog.

Even though it has been in the high 70's here. I thought that because it's winter and the holidays, Hot Chocolate on a Stick would be the perfect little treat to give out. (I swear it's not because I thought it'd be a good idea to buy 500 wooden skewers!!) I made simple tags saying "Hot Chocolate on a Stick" and on the back of each tag it had instructions. Simply swirl and melt  in 4 to 8 Ounces of warm milk. Snuggle up and Enjoy. Or you can do what a few people I know did with these Hot Chocolate on a Stick and just eat them right off the stick. :)


These are the Wooden Skewers that I bought, but you can use swizzle sticks or anything else.
These Hot Chocolate on a Stick are soft like a truffle, but it still holds its shape. Marshmallows are always best when they are homemade, so skip the store bought bag and make your own. They're softer, lighter, fluffier and of course tastier! I made the chocolate first and than the marshmallow after, but you can make whichever one you want first. 

I love these Hot Chocolate on a Stick because it can be easily customized. You can add crushed peppermint, ground espresso, cayenne or nuts on the top of the chocolate before it sets or you can add drops of flavoring to the chocolate itself.. Or keep the chocolate simple and switch up the marshmallows by making lavender, peppermint or gingerbread marshmallows.


Thursday, November 7, 2013

Apple Cider Caramels


One thing that I love about Fall is that it just isn't months of how much pumpkin can I get into everything, but it is also how much apple can I get into everything. These apple cider caramels are the perfect item to add to your list. While making these caramels, you will notice the smell of apples and cinnamon filling your kitchen. The more that the apple cider reduces down, the lovelier your place will smell. These apple cider caramels aren't hard, they are soft, buttery, chewy and full off apple goodness with a hint of sea salt. Amazing!

This recipe makes a lot of little apple cider caramels which makes them perfect for sharing. And if you're like me and lucky enough to live with someone who doesn't enjoy caramel as much as you do, you can eat as much as you'd like without having to hide your stash. But beware, these apple cider caramels will not last long, whether you keep them to yourself or you share them with the ones you love. 

Tuesday, October 22, 2013

Brain Cake Pops


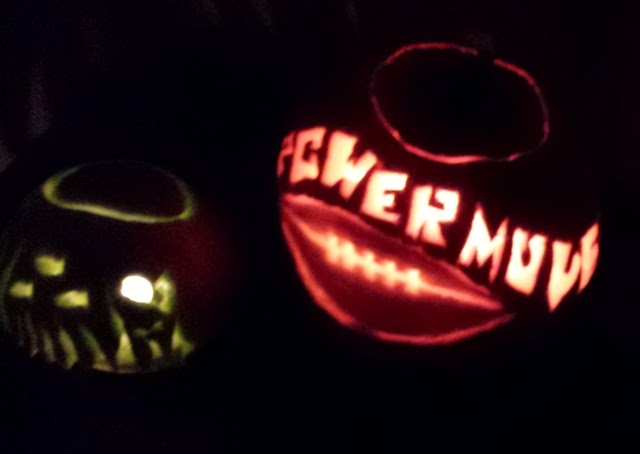
Halloween is just around the corner and I wanted to share with you these brain cake pops! I made these little beauties for a Pumpkin Carving Party this past weekend. Before I go on about how you can make these brain cake pops yourself, I thought I'd share with you the Pumpkins that were made this past weekend. Including the one Honeydew Melon that one person brought to carve instead of a pumpkin. Can you guess which one it is?


Who wouldn't love to take a bite out of a little brain?! I've been wanting to make these brain cake pops for awhile and wanted them to be perfect in their own cute little boxes. After hours of trial and error, I managed to successfully get these cake pops out of their molds and into their boxes.

Interested in making these brain cake pops yourself? Then keep on reading....  First you're going to have to get yourself the mold and boxes. I got the molds from Amazon, you can find it here. I made the boxes using the template that I made and you can find the download on my Etsy Shop. Unfortunately, since I made so many boxes and was trying to make these cake pops in a little bit of a rush, I didn't get too many pictures.